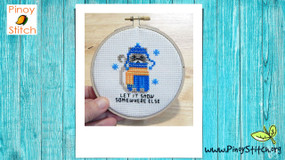
So you've finished your cross stitch project and now you want to frame it. The easiest way to frame your mini projects is to put it into a hoop. Here is how.
PREPARING YOUR PROJECT
Add 3 inches to your finished cross stitch project and cut. Example, if the design is 3” x 3”, cut fabric 6” x 6”.
Find the center of the fabric by folding it in half then folding it again from top to bottom. Pinch the corner of the fabric and put your needle through to mark the center of the fabric.

Locate the center of the design on the chart. Once you find the center, start stitching from that point outwards.
FINISHING YOUR PROJECT ON A HOOP:
You will need (1) Double Sided Tape (2) Solid or printed fabric (3) Hoop (4) Scissors.
To cover the back portion of your project, use either a solid color or printed fabric. It is recommended to use a similar fabric shade as your cross stitch project to avoid affecting the design. If your project is stitched on white Aida, use a light colored fabric. Cut the fabric the same size as your cross stitch project.
Turn the project over to the front and work the outer hoop on top. Center the design and adjust Aida and fabric by pulling at edges and twisting the screw until it is taut.

Turn the project over to the back and trim the fabric close to the hoop. Trim Aida cloth about ¾” from the hoop edge. Line the hoop with double sided tape.

Fold the Aida cloth over the double sided tape and press down firmly. You are done!
